Import Cases
Overview
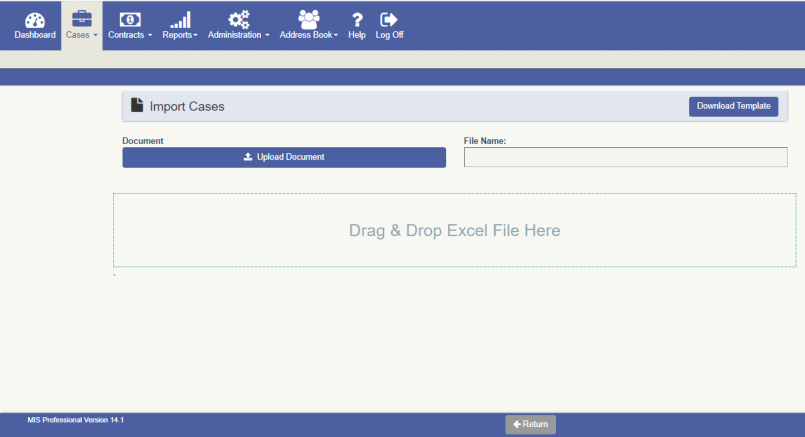
The Import Cases screen is used to:
1. Download the Excel template used to import cases.
2. Import cases (both pre-need and at-need) from other systems via a spreadsheet.
Download Template:
If you are interested in importing cases from other systems you must ensure that you have the current import template. You can generate the template by clicking the Download Template button.
The template is an XLSX workbook containing two tabs. One Tab has the template for at-need cases and the other for pre-need cases. The tab has the column headers for the data needed to import a case. Most of the column headers are self-explanatory. The table below, describes the headers that are more ambiguous or have significance.
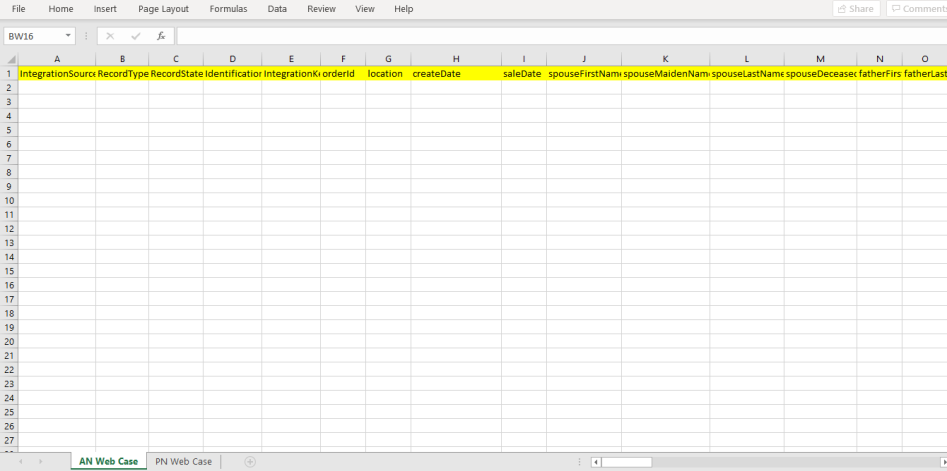
AN Web Case
All of these fields are required.
| Column Header Name | Definition |
| Location | Location should be a valid location CODE |
| IntegrationSource |
For at-needs the value should be AN Web Case For pre-needs the value should be PN Web Case |
| RecordType |
For at-needs the value should be First Call For pre-needs the value should be PN Case |
| RecordState | Should be set to New |
| Identification | This should be the decedent (AN) or beneficiary’s (PN) name in the format Last, First, MI |
| IntegrationKey | Should be a unique value to avoid duplication |
| OrderID | This is the order id / case number / contract number from the source system. This must be provided |
| AdditionalComments | This field can be used to contain any information that you want transferred to a Case Note. |
| PackageName |
This is the name of the package purchased in the source system. Be sure to map potential PackageNames to your template / options using the Import Mapping screen. Only one package name is allowed per case. |
| ProductName |
This is the name of the products purchased in the source system. Be sure to map potential ProductNames to item codes using the Import Mapping screen. This field can contain several products separated by a comma. You would use this field to select products purchased that are not automatically selected by the template / option combination. |
| PaymentType |
This is the payment type recorded in the source system. Be sure to map potential payment types in the Import Mapping screen. Only one payment type is allowed per case. |
| SalesNeed |
This is the sales need of the case. For at-needs, the value should be atNeed For pre-needs, the value should be preNeed |
Important Notes:
- The first row of the excel template is treated as the header row. Do not delete this row.
- If the excel is having the record with missing “Integration Source” value, then system will not process that record (skip that record).
- Order Id should be provided, if it is not provided, the case will be imported but the details will not get displayed on the front end.
- For at-needs, you must include decedent first and last name as a minimum.
- For pre-needs, you must include beneficiary first and last name as a minimum.
- The dates should be provided in a format like 20200218T23:47:42Z.
Steps to Use the Import
1. Click on the Import Case button. The Import Cases screen appears.
2. Click the Download Template button to download the template (xlsx file).
3. Fill the xlsx with valid data.
4. Upload the excel by using the browse button (you can drag and drop the file as well).
5. On successful upload, system will show a success message that the case data has been imported, such as:
Import Case : 19 record(s) uploaded successfully
6. Imported cases will appear on the dashboard in the Pending Cases & Bridges Data widget
7. Use the review screen to create the case in the system. Case numbers can be automatically or manually assigned.